|
|
|
|
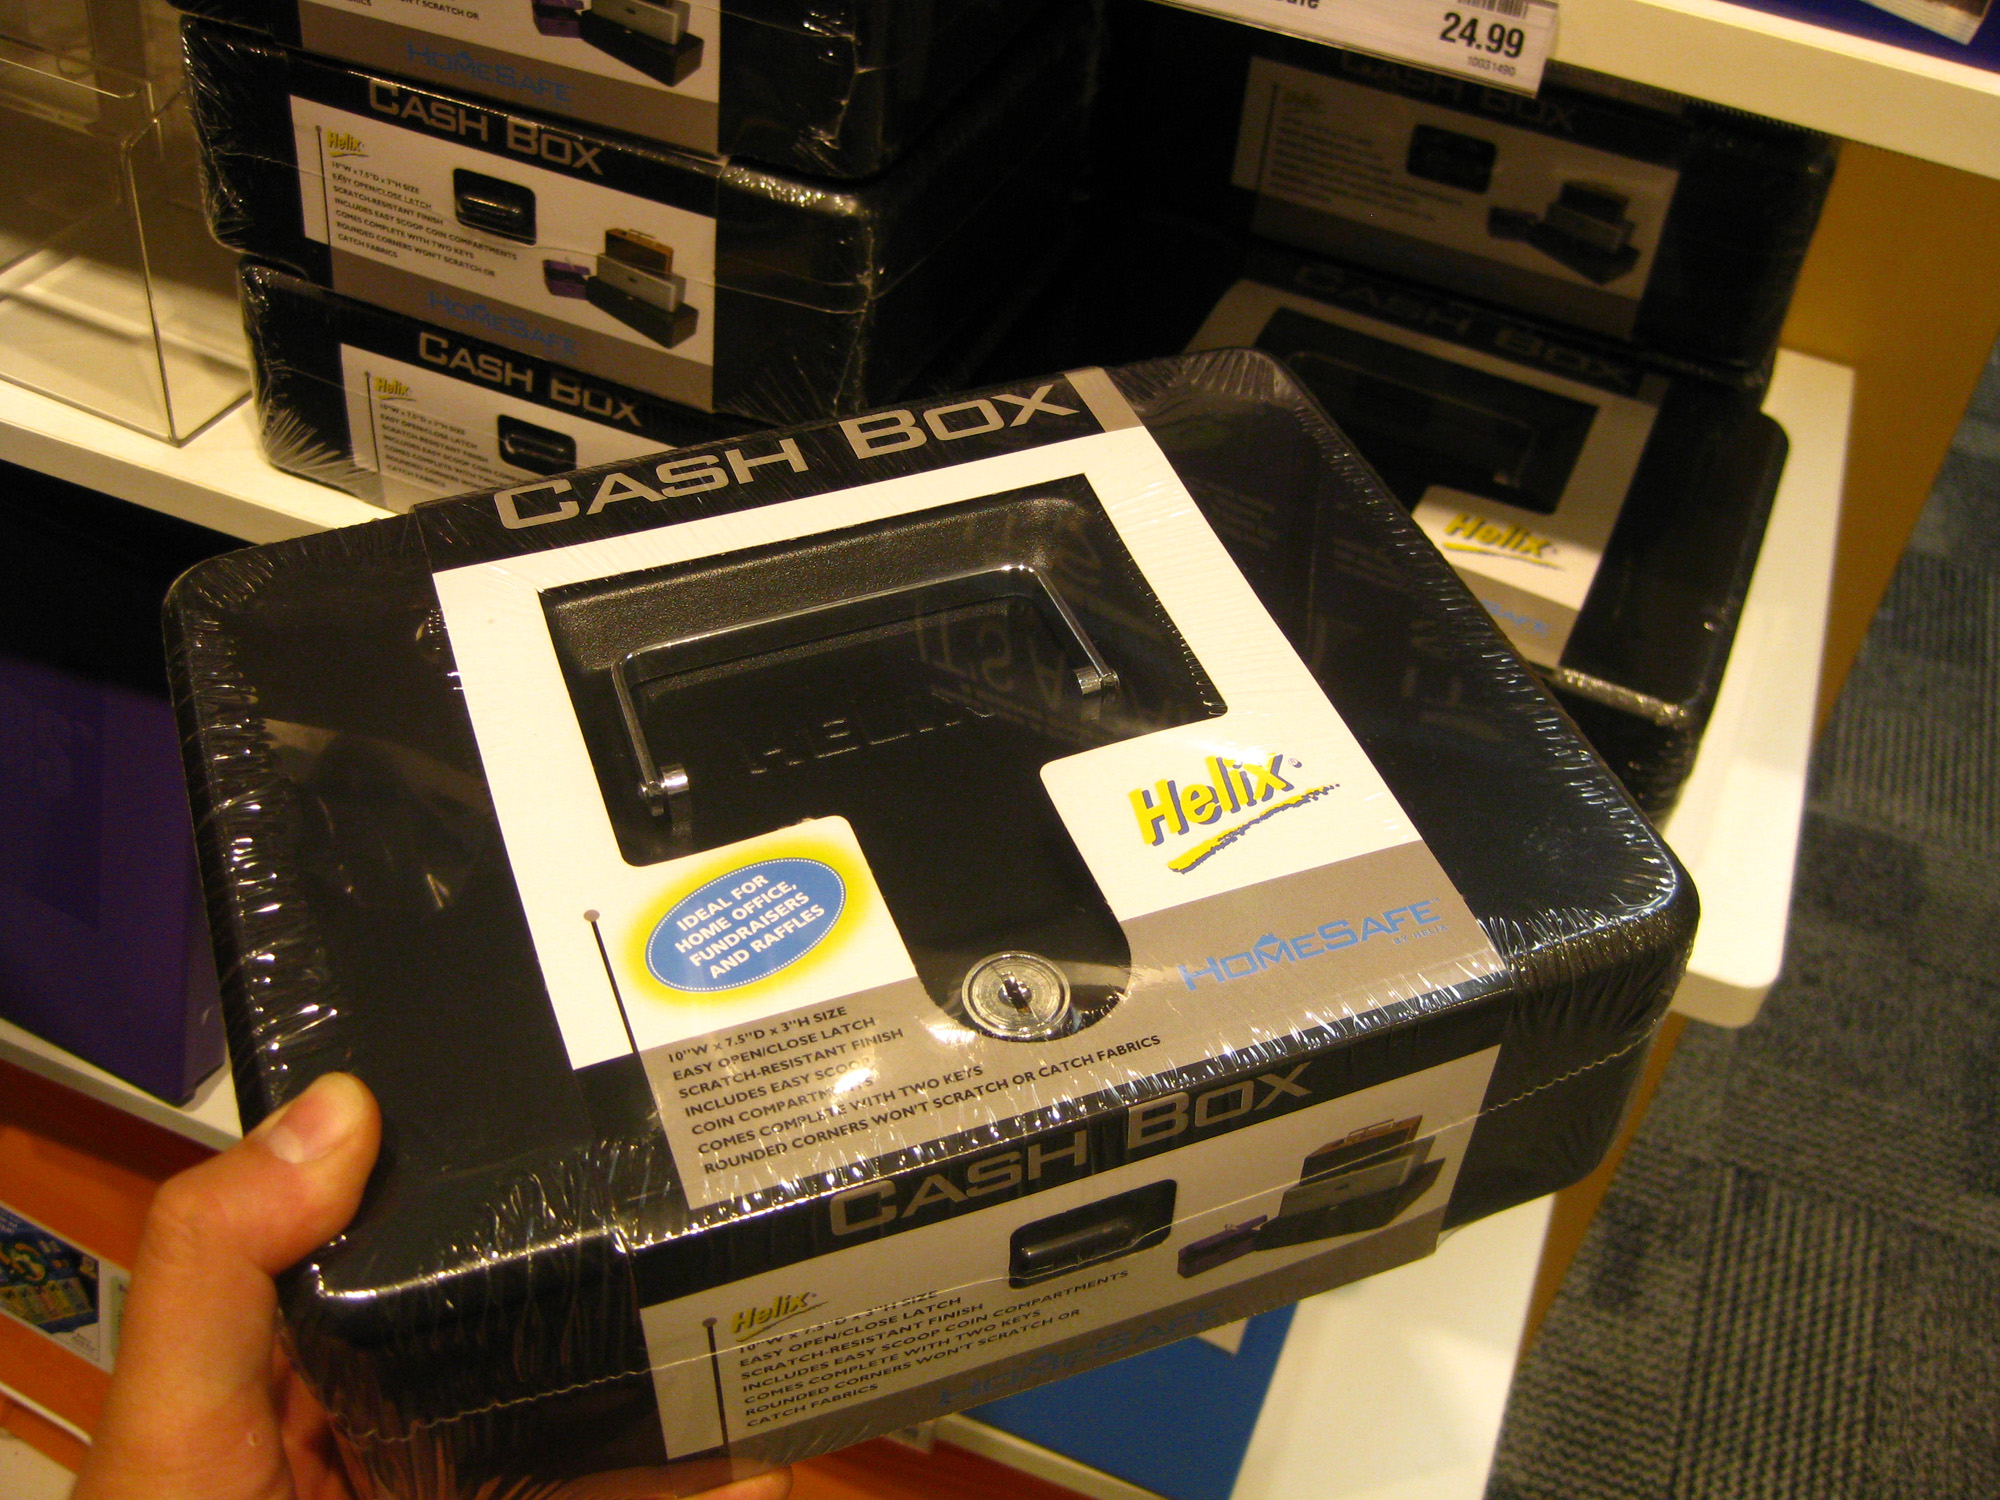
This
Helix brand cash box is sold at the Container Store for $19.99. It is
item number 285010. I would include a link to their web site but it sucks
and i can't find this item there anywhere. It weighs almost nothing and
is 10" x 7½" x 3½" in size.
|
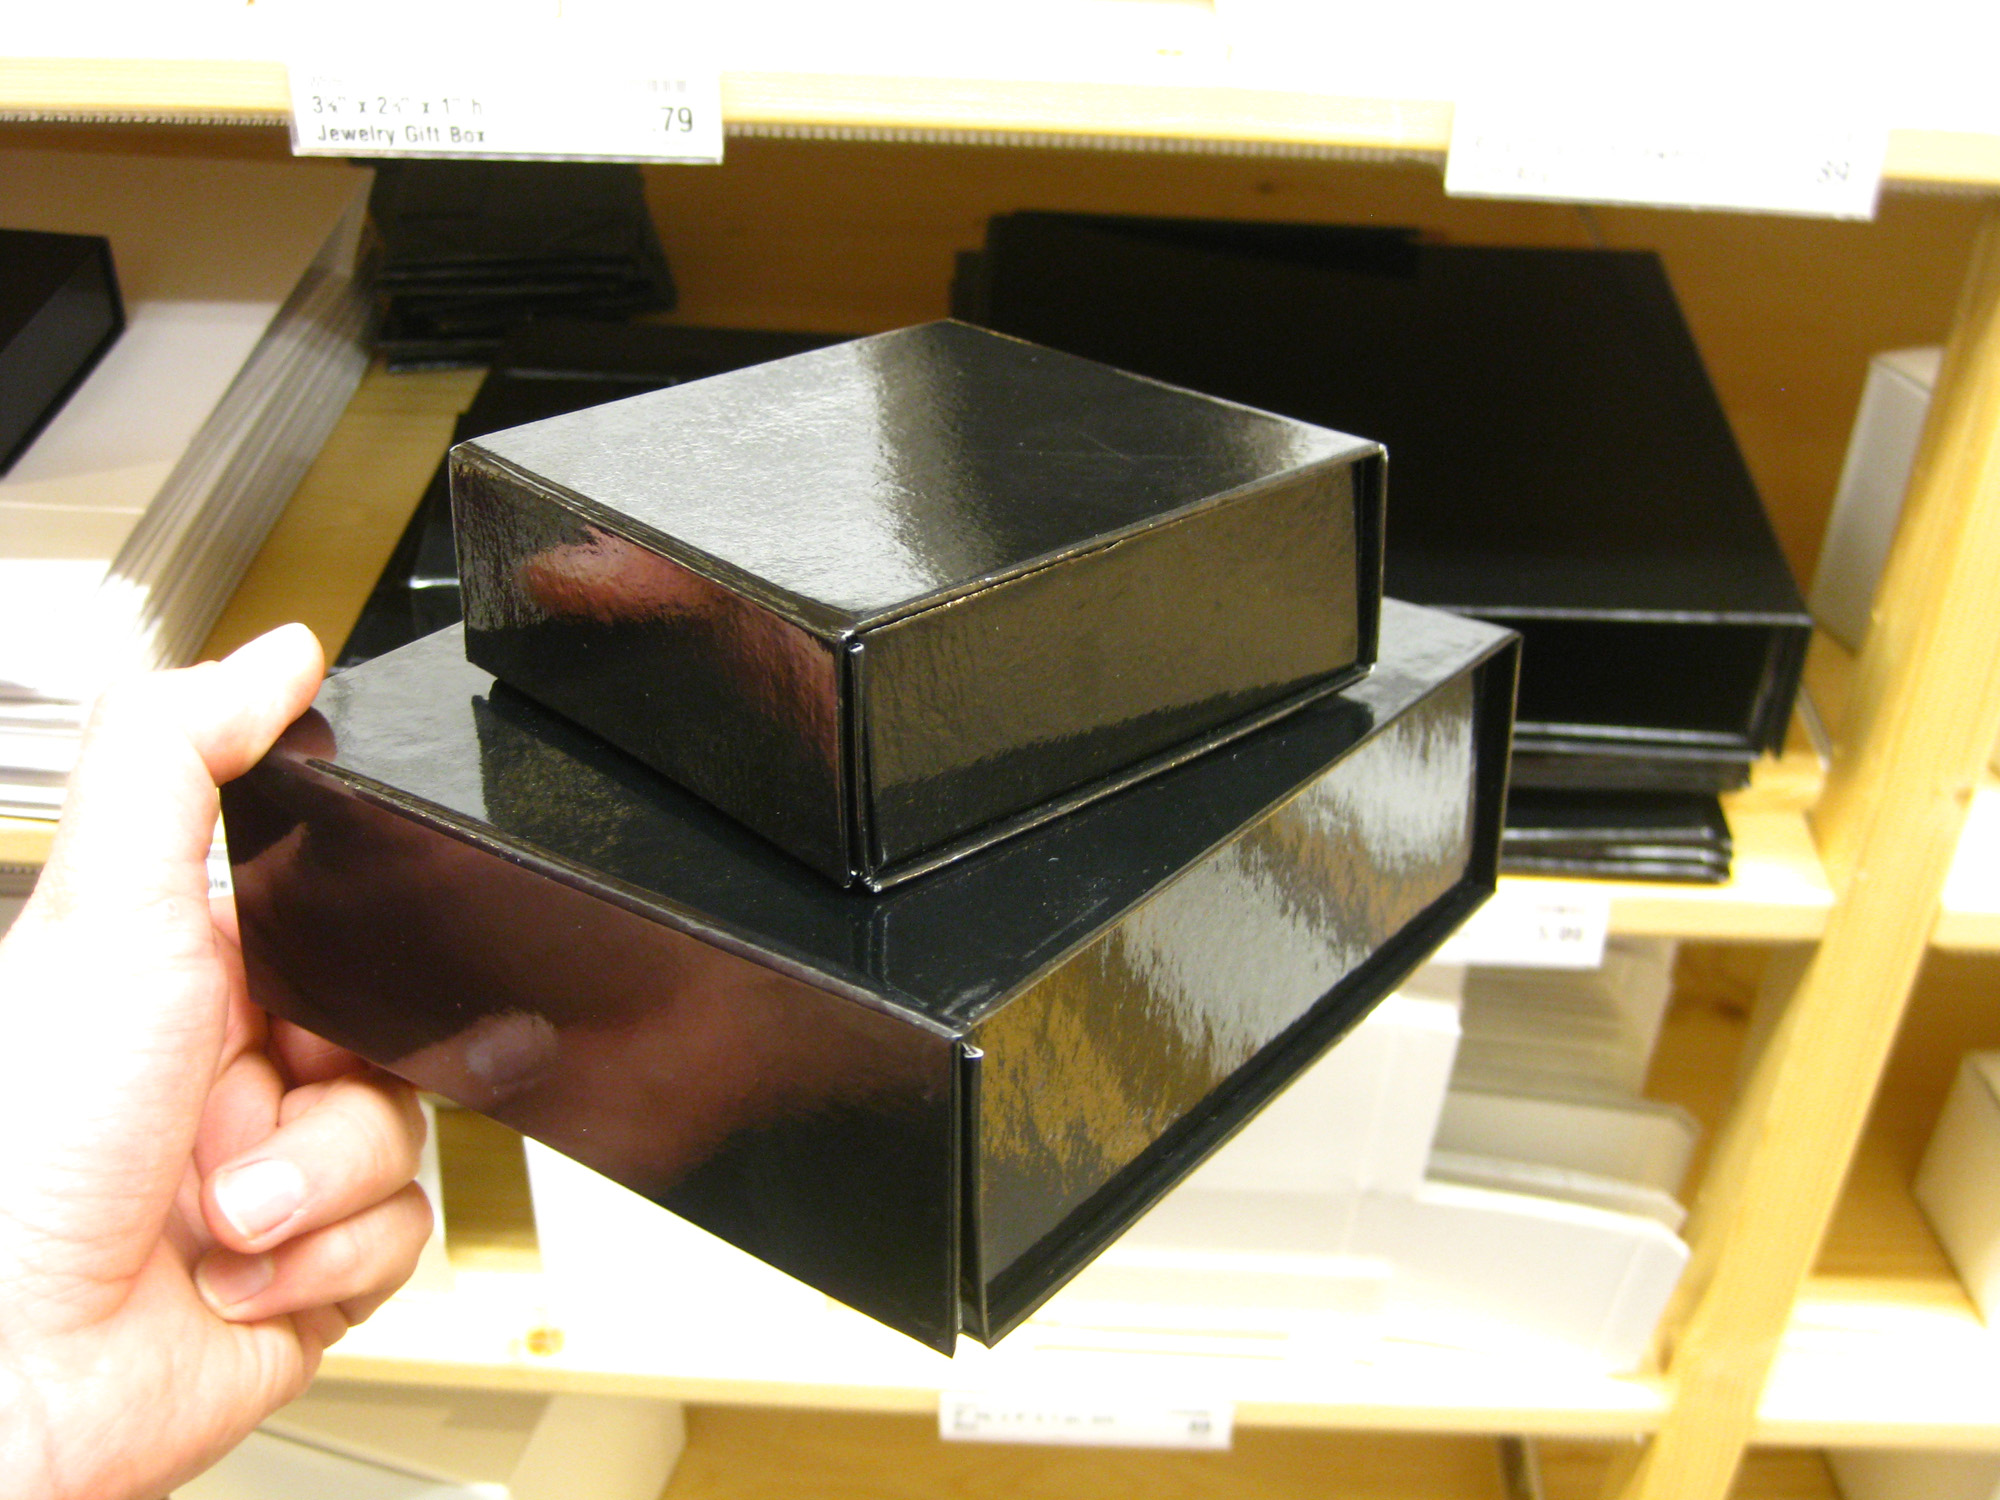
The
other items you'll need at the Container Store are these "collapsible
gift boxes" because they are awesome. The smaller of the two (called
"medium" in the store) is item number 10050304 and costs $3.99.
It is 5½" square and 2" high. The larger box is item
number 10050306 and costs $5.99. It is about 9½" square and
2" high.
|
|
|
|
|
Here
are the items that i picked up at The Home Depot. I didn't wind up needing
small bolts and nuts, but the brass "safety hasp" worked out
well. Both Liquid Nails and JB Kwik are great for bonding metal to fibers
like paper or wood. Having a rotary tool also is a big help.
|
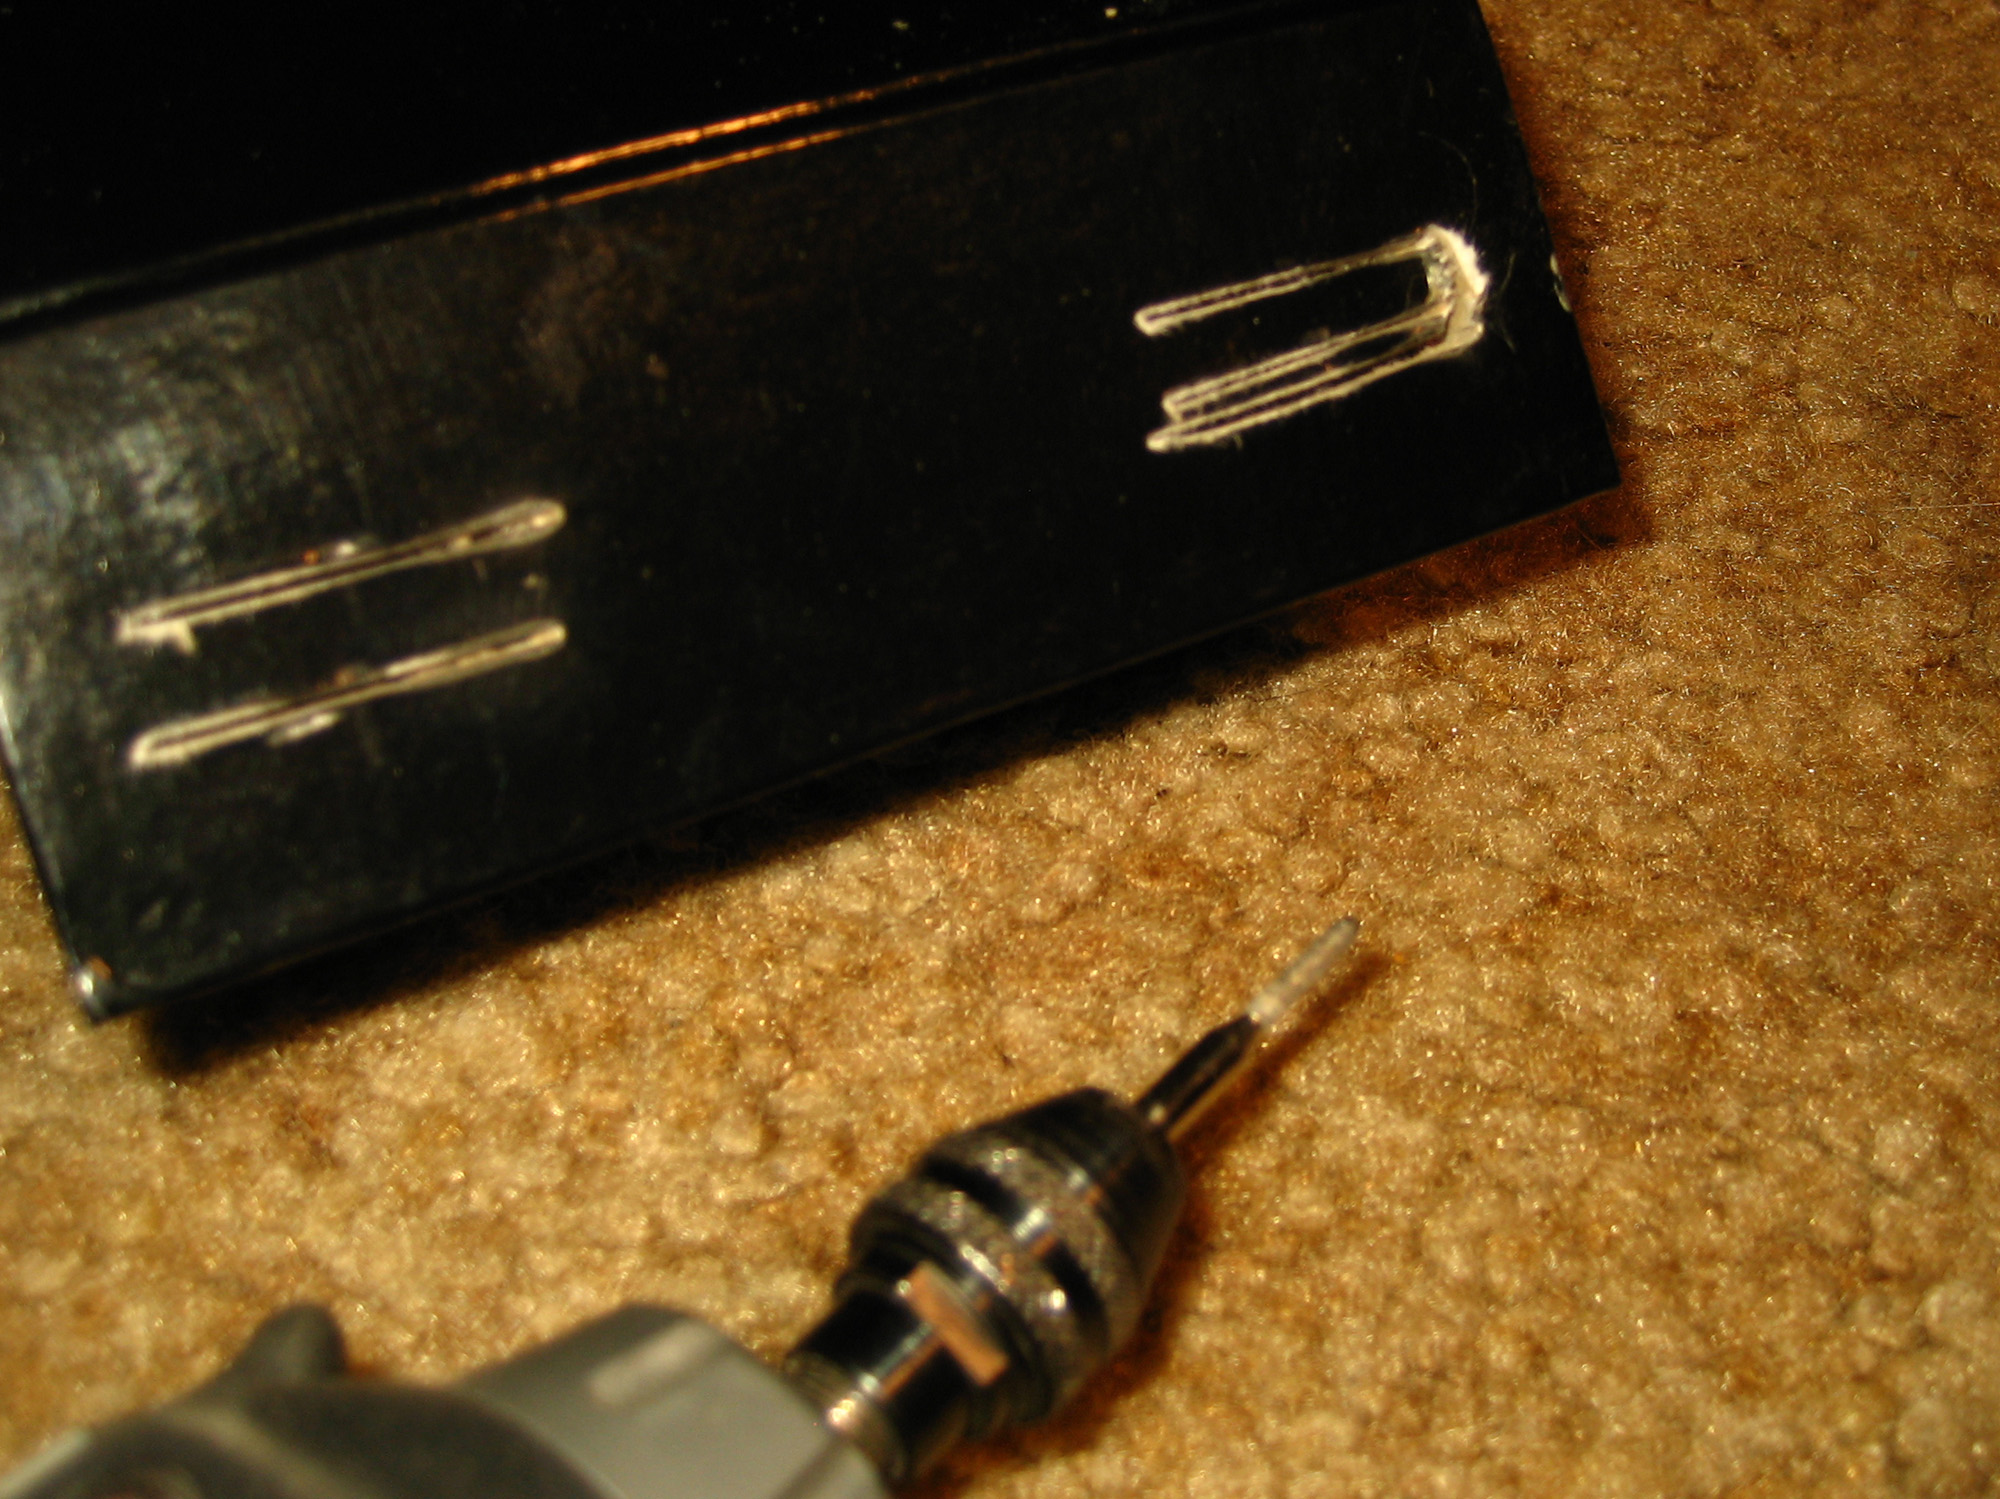
Here's
the hasp i wound up going with that worked especially well. As you'll
see in later steps, i used a cutting wheel on my rotary tool to slice
off the end of the clasp cover.
|
|
|
|
|
Start
by making a pair of parallel slices into the front cardboard flap. About
an inch wide (basically the width of a standard cutting wheel) and maybe
a quarter inch apart will work. Try not to let the rest of your rotary
tool scrape into the cardboard, however. The little slip-up you see there
was fixed with a Sharpie, however.
|
Making
all the horizontal cuts first allows you to adjust and tweak them a bit
to make things as even as possible. Remember, we're going to frame the
front slots with brass plating, so they don't have to be perfect.
|
|
|
|
|
Use
your cutting wheel to chop the clasp plate in half, then switch to a small,
thin tip on your rotary tool.
|
Grind
out the small edges of the slots. The cardboard is thick, but it should
go easily.
|
|
|
|
|
Slots
completed. Time to glue on the brass plates...
|
...
and the hasps that will poke through. Be sure to line things up carefully!
|
|
|
|
|
In
its current form, the box can still make use of its coolest feature...
|
...
with the pull of a ribbon, these boxes fold totally flat.
|
|
|
|
|
Even
with the new hardware, this is possible.
|
Totally
collapsed box.
|
|
|
|
|
The
"collapsible" feature allows your larger metal cash box to hold
a whole lot of extra gear during transportation if you want it to.
|
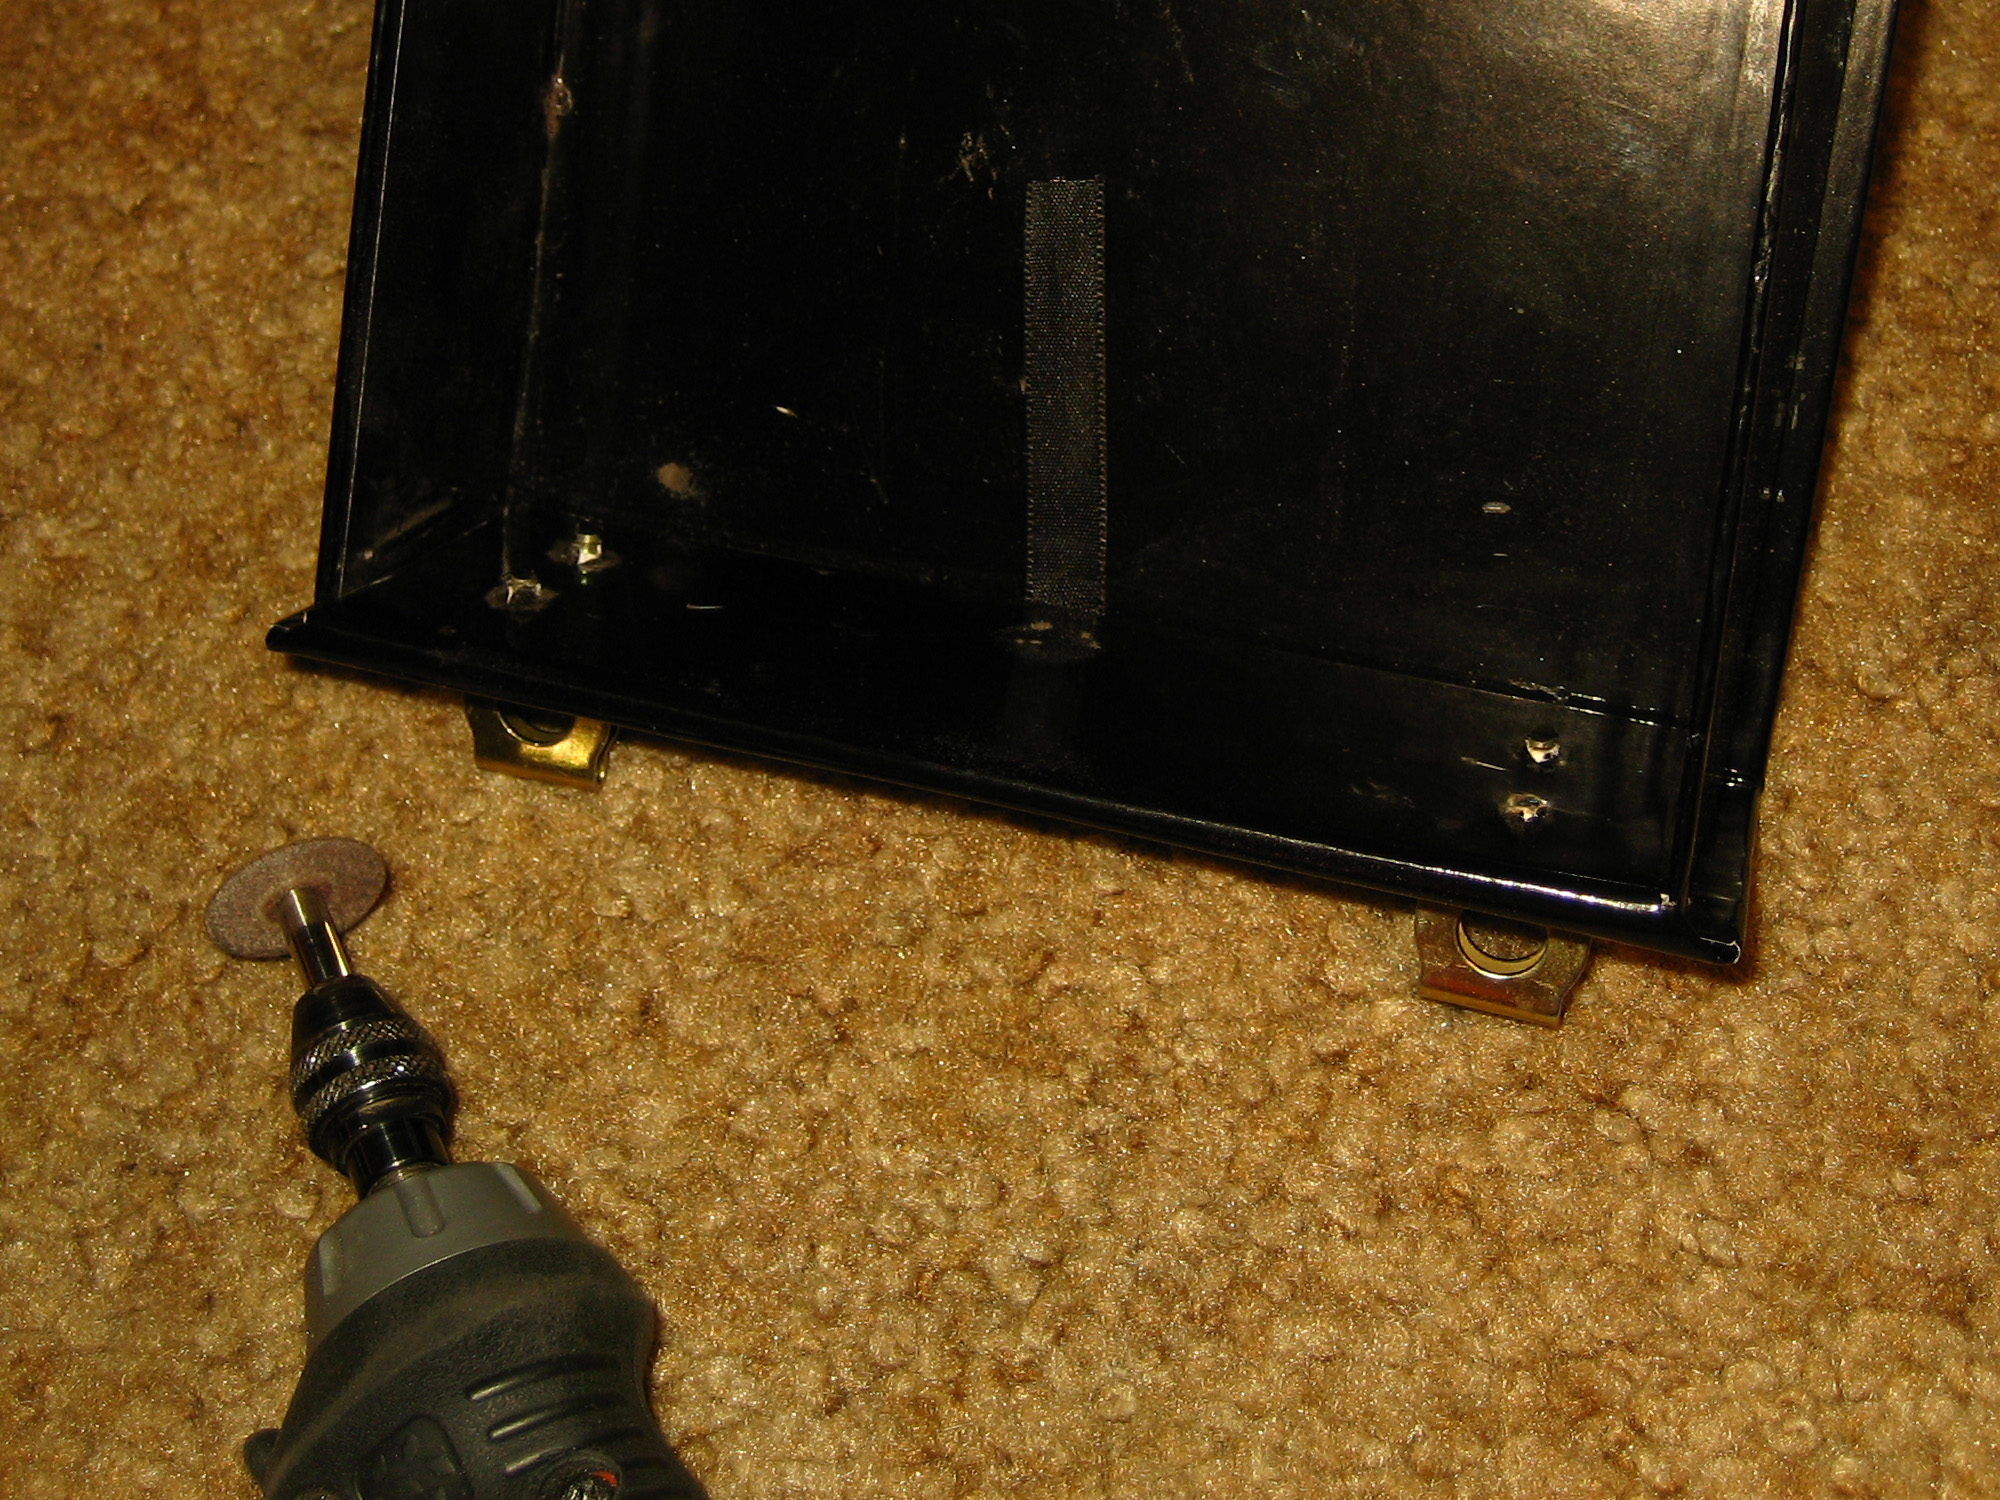
Personally,
i chose to use some of the included screws to anchor the hasps down more
securely to the front face of the box. This eliminates easy collapsing,
but they could always be unscrewed on the fly if necessary. There is the
matter of those spiky bits on the other end, of course.
|
|
|
|
|
Some
quick work with a rotary tool's cutter disks can handle the ends of the
screws that protrude into the box.
|
Take
caution... these scrap metal bits get very hot during cutting and have
a tendency to melt directly into one's carpet if they fall on the floor
when you're doing this. ;-)
|
|
|
|
|
While
they may look brass, pretty much all of the hardware store components
you find today are light iron with a thin brass plating. The shavings
that fly off when you're cutting the tips of the screws can make some
cool artwork, since the collapsible cardboard box uses magnets to open,
close, and maintain its shape. Heh, art. It's cool.
|
|
|
|
|
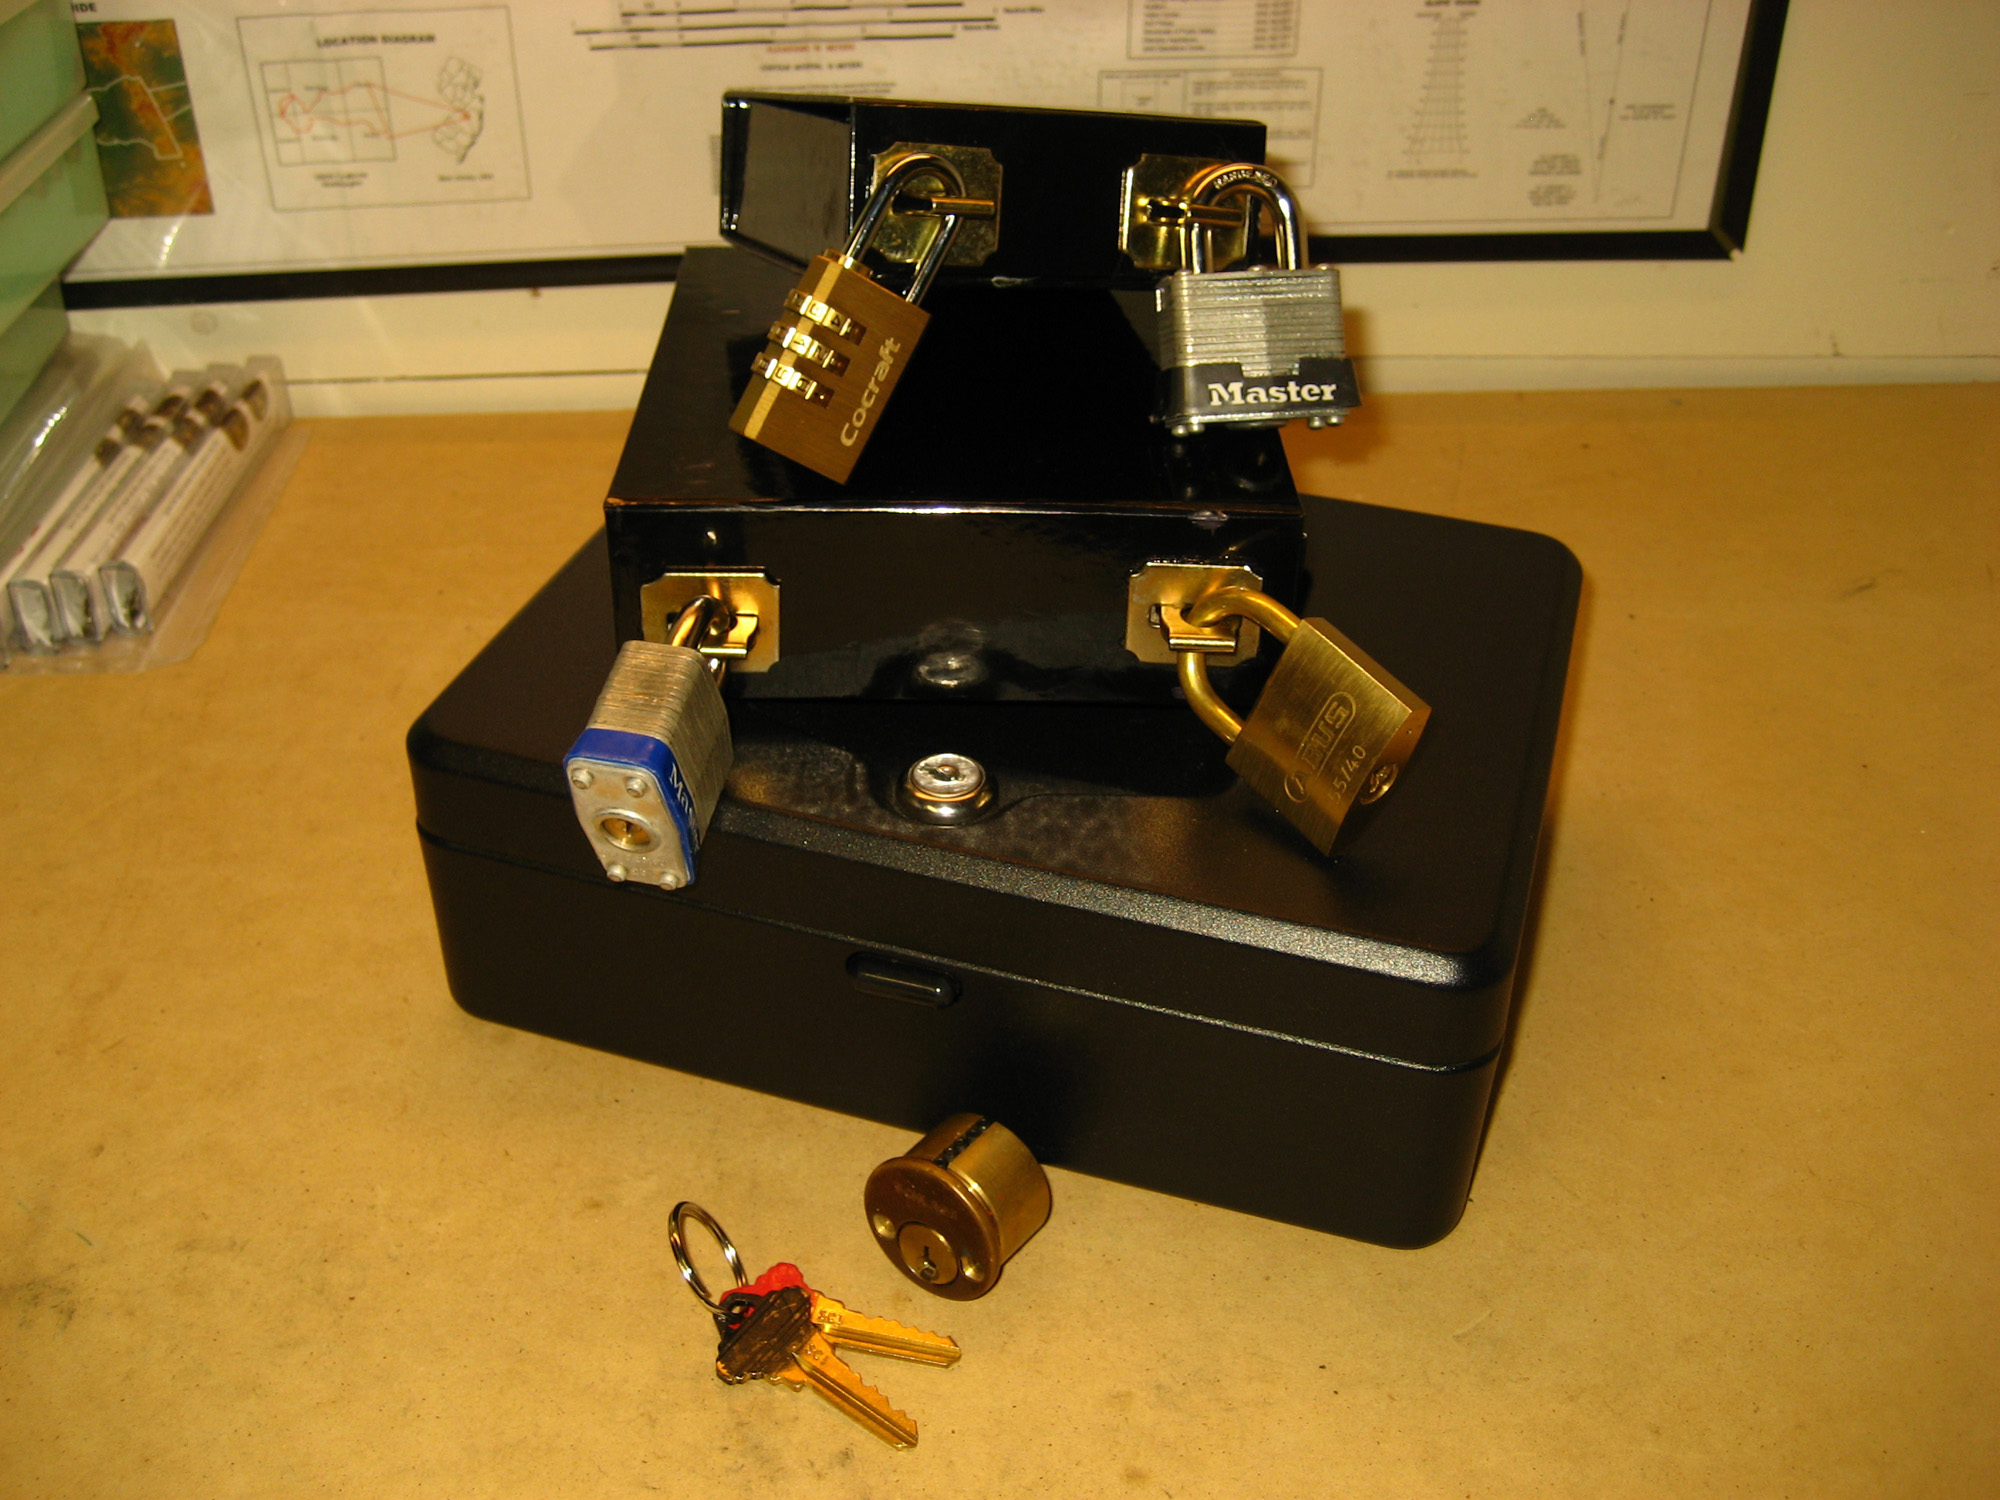
The
finished boxes. Don't they look nice?
|
One
last note... while the wafer lock built into the Helix cash box is fine,
i opted to remove it and replace it with a wafer cam lock from the Home
Depot. I had to carve out the fitting hole a bit and cut down the rear
cam considerably, but this allows me to keep a spare wafer lock with me
in case i have to repair things during a run of the contest at a conference.
|
|
|
|
So
there we are, the finished product. Outfit it with locks however you like...
i don't find anything particularly bad about just grabbing some cheap
Master padlocks at the hardware store. Master No. 3 locks with the classic
blue band (if you can still find them) are great for simple, easy picking.
The "commercial grade" of Master locks are actually a nice medium
difficulty challenge, often featuring a single spool pin somewhere.
In
the end, it's up to you to be as creative as you like. As you might be
able to see in some of the action shots, there's
enough room in the cash box next to the cardboard boxes to include an
empty can and a pair of scissors... why not include a combo lock at some
point, forcing people to either try to make their own shims on the fly
or take the longer, slower tactic of decoding.
There's
also no limit to how Pandora's Lock Box can be incorporated into other
games at a conference. Maybe a WiFi cracking challenge can have clues
(MAC addresses, perhaps a character set used in a particular WPA key)
written on slips of paper in various stages of the game. The further a
team manages to use players' lockpicking stills to penetrate the layers
of boxes, the more clues they get to help them forward in other areas
of an entirely different challenge.
If
you make one of you own, let me know... and have fun teaching other to
put their skills to the test!
|